Recently I was working on making a new Virtual machine for Vulnhub(it’s in beta right now) and one of the issues I came across was the problem of not having any interface except the loopback (lo) in the newly created VM. Now setting a new interface is easy but What I wanted was to set Dynamic DHCP IP so whenever someone starts the VM it’s assigned an IP using which they can attack the box.
Now the problem here is that recent versions of Linux uses a new network interface naming scheme called “Predictable Network Interface Names”. This mean your interface name might not be eth0, it maybe different on diffrent machine. This is done for lot of various reasons like having a stable interface names during reboots or during kernels/drivers updates etc. But this can sometime cause issue when you move a VM from VirtualBox to VMware player/workstation, the issue would be that VMware/vbox might not pick up the IP meaning the VM will run but no IP will be assign to it so you won’t be able to access that VM from outside.
@DCAU7 has done some investigation on this and found out that:
VMware Player can have issues with Bridged Networks. This is detailed in this video
The interface name changed and this directly affected the ability to pick up a DHCP address due to differences between the name and what appears in
/etc/network/interfacefile.
He came up with a solution for this but that solution doesn’t work on Ubuntu 17.10 or hight because of netplan. Netplan is a new command-line network configuration utility introduced in Ubuntu 17.10 to manage and configure network settings easily in Ubuntu systems. It allows you to configure a network interface using YAML configuration. So only editing the /interface file wouldn’t change the interface name. We will have to make a netcfg.yaml file in /etc/netplan/ along with some other files to fix this problem and get an interface named eth0 permanently.
Solution
The permanent solution for this would involve editing the /etc/network/interface and also making a /etc/netplan/01-netcfg.yaml file. Also we’ll have to edit the /etc/default/grub.
- Edit grub -
nano /etc/default/grub
Edit the line GRUB_CMDLINE_LINUX="" to GRUB_CMDLINE_LINUX="net.ifnames=0 biosdevname=0"
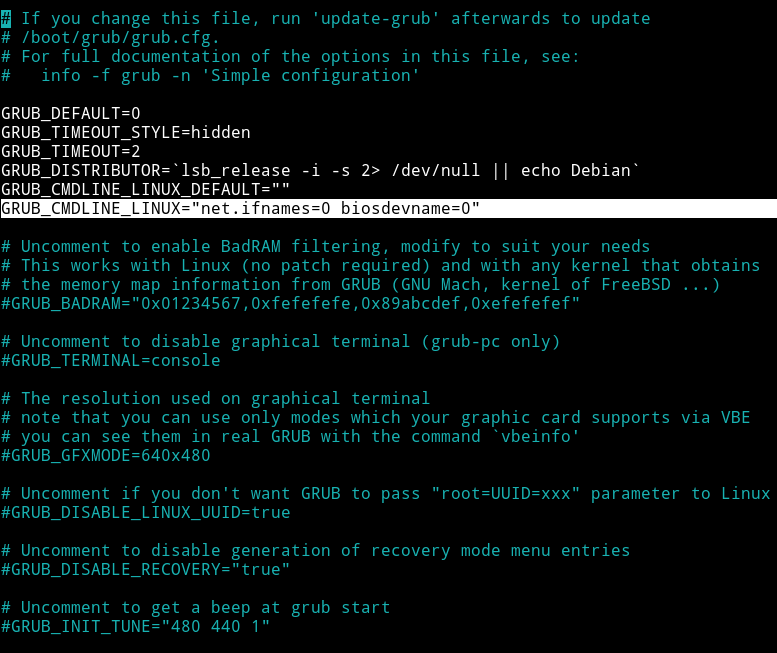
Then apply those changes by running: grub-mkconfig -o /boot/grub/grub.cfg
- Edit interface -
nano /etc/network/interfaces
Make sure it look like
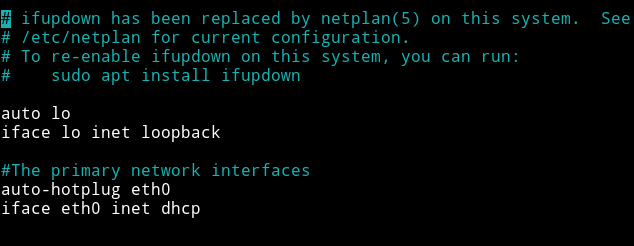
So most probably you might have to add
#The primary network interfaces
auto-hotplug eth0
iface eth0 inet dhcp
- Make netplan config -
nano /etc/netplan/01-netcfg.yaml
It’s highly likely that this file might not exists on your system and you might have to make it. One thing to keep in mind is no need to name the file 01-netcfg the important part is the .yaml extension, netplan reads all the .yaml file under /etc/netplan/. so file could be named ubuntu-going-crazy.yaml, what matter is the content of the file and that extension.
add the following to your yaml config file:
network:
  version: 2
  renderer: networkd
  ethernets:
    eth0:
      dhcp4: yes
      dhcp6: yes
Here under ethernets I have used eth0 because that’s the interface name I’ve used in /etc/network/interfaces and also that’s the name I want :-)
Now apply these changes by running: sudo netplan apply.
Once all these things are done, reboot the VM and you will have a new interface named eth0, you can check this by running ifconfig -a or ip addr
This was one of the most important part of making a VM and I am thankful to @DCAU7 because he helped me in setting this up.
Hope this will help you in someway or the other.
Thanks for reading, Feedback is always appreciated.
You can follow me on @0xmzfr.